

-
Productswith more than 15 years brushes working experience

-

Step-by-Step Tutorial: Mastering Contouring and Highlighting with a Triangle Foundation Sponge
Release Time:
Jan 03,2025
Step-by-Step Tutorial: Mastering Contouring and Highlighting with a Triangle Foundation Sponge Table of Contents 1. Introduction to Contouring and Highlighting 2. Understanding the Contouring and Highlighting Technique 3. Why Use a Triangle Foundation Sponge? 4. Essential Products for Contouring and Highlighting 5. Step-by-Step Guide to Contouring and Highlighting 6. Commo
Step-by-Step Tutorial: Mastering Contouring and Highlighting with a Triangle Foundation Sponge
Table of Contents
- 1. Introduction to Contouring and Highlighting
- 2. Understanding the Contouring and Highlighting Technique
- 3. Why Use a Triangle Foundation Sponge?
- 4. Essential Products for Contouring and Highlighting
- 5. Step-by-Step Guide to Contouring and Highlighting
- 6. Common Mistakes to Avoid
- 7. Tips for a Flawless Finish
- 8. Conclusion
- 9. Frequently Asked Questions
1. Introduction to Contouring and Highlighting
Contouring and highlighting are essential makeup techniques that can dramatically enhance your facial features. By creating shadows and light in specific areas, you can sculpt your face, making it appear more defined and radiant. This tutorial will guide you through the process of using a triangle foundation sponge, a versatile tool that simplifies these techniques and ensures a seamless application.
2. Understanding the Contouring and Highlighting Technique
Before diving into the application process, it's critical to understand what contouring and highlighting entail.
The Basics of Contouring
Contouring involves applying a darker shade of makeup to specific areas of the face to create the illusion of shadows. Typically, this technique is applied to the sides of the nose, under the cheekbones, and along the jawline.
The Importance of Highlighting
Highlighting, on the other hand, uses lighter shades to accentuate the high points of the face, such as the cheekbones, brow bones, and the bridge of the nose. This combination of contouring and highlighting creates balance and dimension, enhancing your natural beauty.
3. Why Use a Triangle Foundation Sponge?
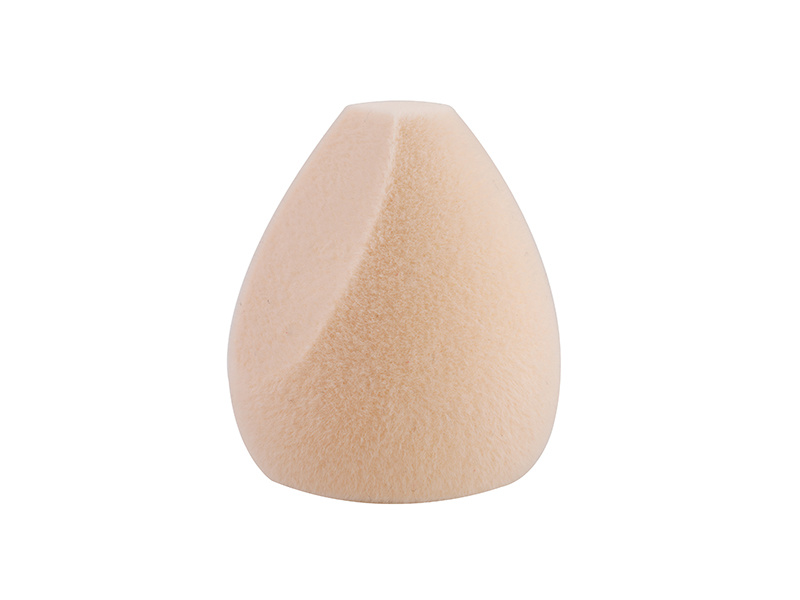
A triangle foundation sponge is a game-changer for anyone looking to perfect their contouring and highlighting skills. Here are a few reasons why this tool is essential:
Flexible Shape
The triangular shape allows for precise application in both large and small areas of the face. The pointed tip is ideal for reaching tight spots, while the broader sides can cover larger areas efficiently.
Blending Power
Triangle sponges are designed to blend makeup seamlessly, ensuring that there are no harsh lines. This is crucial for achieving a natural look.
Versatility
Not only are triangle sponges great for contouring and highlighting, but they can also be used for applying foundation, concealer, and even blush, making them a must-have in your makeup kit.
4. Essential Products for Contouring and Highlighting
To achieve the best results, you'll need to gather a few essential products. Here’s what we recommend:
Foundation and Concealers
Invest in a high-quality foundation that matches your skin tone, along with a couple of concealers—one darker for contouring and one lighter for highlighting.
Contouring Palette
A contouring palette will typically include a range of shades that allow for customization based on your skin tone. Look for products that offer both cream and powder formulas.
Setting Powder
To ensure your makeup lasts throughout the day, a translucent setting powder is essential. This helps to eliminate shine and set your makeup into place.
5. Step-by-Step Guide to Contouring and Highlighting
Now that you have your tools and products ready, let’s dive into the step-by-step process of contouring and highlighting with a triangle foundation sponge.
Step 1: Prepare Your Skin
Start with a clean, moisturized face. Apply a primer to create a smooth base for your makeup, ensuring lasting wear.
Step 2: Apply Foundation
Using the triangle foundation sponge, apply your foundation evenly across your face. Blend it seamlessly into your neck for a natural look.
Step 3: Contour
1. **Choose the Right Shade**: Select a contour shade that is 2-3 shades darker than your foundation.
2. **Apply Using the Sponge**: Use the angled side of the triangle sponge to apply contour to the hollows of your cheeks, the sides of your nose, and along your jawline. Be careful not to apply too much product at once; you can always build it up.
3. **Blend Thoroughly**: Use the clean side of the sponge to blend the contour into your foundation, ensuring there are no harsh lines.
Step 4: Highlight
1. **Select Your Highlight Shade**: Choose a highlight that is 2-3 shades lighter than your foundation.
2. **Apply to High Points**: Use the pointed tip of the triangle sponge to apply highlight to the tops of your cheekbones, the bridge of your nose, the center of your forehead, and above your brow bones.
3. **Blend for a Natural Finish**: Again, use the sponge to blend the highlight into your skin, ensuring a seamless transition between highlighted and contoured areas.
Step 5: Set Your Makeup
Dust a light layer of translucent setting powder over your face to lock everything in place. This will help to diminish shine and prolong the wear of your makeup.
6. Common Mistakes to Avoid
Even experienced makeup artists can make mistakes when contouring and highlighting. Here are some common pitfalls to avoid:
Using the Wrong Shade
Always choose shades that complement your skin tone. Too dark or too light can result in an unnatural look.
Applying Too Much Product
Less is often more. Start with a small amount of product and build up if needed to avoid heavy application.
Neglecting Blending
Blending is crucial in achieving a seamless finish. Take your time to ensure all lines are well-blended.
7. Tips for a Flawless Finish
To enhance your contouring and highlighting game, consider the following tips:
Practice Makes Perfect
Take the time to practice your technique. The more you practice, the more confident you’ll become.
Use Quality Products
Invest in high-quality makeup products that work well with your skin type. Quality products yield better results.
Adapt to Your Face Shape
Tailor your contouring and highlighting technique to fit your unique facial structure. Research face shapes to understand where to apply product for the best results.
8. Conclusion
Contouring and highlighting with a triangle foundation sponge is an art form that can elevate your makeup skills and boost your confidence. By following this step-by-step tutorial, gathering the right products, and practicing your technique, you can achieve a beautifully sculpted and radiant look. Remember, the key lies in blending and using the right shades for your unique complexion. Embrace the process, and enjoy the transformation!
9. Frequently Asked Questions
1. How do I choose the right shade for contouring and highlighting?
Choose contour shades that are 2-3 shades darker than your foundation and highlight shades that are 2-3 shades lighter. It's essential to test the shades against your skin for the most natural look.
2. Can I use a triangle foundation sponge for other makeup applications?
Absolutely! Triangle foundation sponges are versatile and can be used for foundation, concealer, and even blending cream blush.
3. How can I make my contour last all day?
Using a setting powder after your contour and highlight application can help lock in your look. Additionally, choosing long-wearing products will contribute to longevity.
4. Is contouring only for special occasions?
While contouring can enhance any makeup look, it’s not limited to special events. Many people incorporate lighter contouring into their daily makeup routine for a natural, polished appearance.
5. How often should I replace my triangle foundation sponge?
It’s recommended to replace your makeup sponge every 3-6 months, depending on usage. Regular cleaning is essential to maintain hygiene and performance.
Keywords:
Dongguan City Alpha Brush Factory Inc.
Add: 3F Building B,Hetai Industrial Zone, No.1 Datang North Road,Zhutang Village,Dongguan City, GuangDong, CN, 523690
E-mail: Lin@cosmeticbrushesfactory.com

SAF Coolest v1.3.1.2 设置面板 TVISX-ATJJ-DSZAE-ZDE
无数据提示
Sorry,The current column is being updated, so stay tuned!
You can view other columns or return Home